Walking into a gym for the first time can feel overwhelming. You’re surrounded by equipment you’ve never used, people who look confident, and an endless array of accessories that promise faster results. According to the American Council on Exercise (ACE), over 50 million Americans start a gym membership each year—and nearly 80% quit within the first three months, largely because they don’t know which tools will actually accelerate their progress.
The truth? You don’t need expensive equipment or a membership to start. What you need are the right accessories—tools designed specifically for beginners that will keep your form safe, your workouts efficient, and your motivation high.
- 1. Adjustable Dumbbells: The Foundation Accessory
- 2. Resistance Bands: Maximum Versatility, Zero Setup
- 3. Yoga Mat: Safety and Stability Foundation
- 4. Ab Roller: Core Strength Accelerator
- 5. Lifting Straps: Grip Strength Builder
- 6. Knee Sleeves: Joint Protection and Stability
- 7. Foam Roller: Recovery and Mobility Tool
- 8. Jump Rope: Cardio and Conditioning
- 9. Resistance Loop Bands: Progressive Overload Partner
- Frequently Asked Questions
- 1. Adjustable Dumbbells: The Foundation Accessory
- 2. Resistance Bands: Maximum Versatility, Zero Setup
- 3. Yoga Mat: Safety and Stability Foundation
- 4. Ab Roller: Core Strength Accelerator
- 5. Lifting Straps: Grip Strength Builder
- 6. Knee Sleeves: Joint Protection and Stability
- 7. Foam Roller: Recovery and Mobility Tool
- 8. Jump Rope: Cardio and Conditioning
1. Adjustable Dumbbells: The Foundation Accessory
Adjustable dumbbells are non-negotiable for beginners. They replace 15+ individual dumbbells with one sleek pair, saving space and money. Rather than buying a 5 lb, 10 lb, 15 lb, and 20 lb dumbbell for each hand, adjustable dumbbells let you dial in exact weight increments—usually in 2.5 to 5 lb jumps—meaning you can progress precisely as you get stronger.
According to the National Strength and Conditioning Association (NSCA), dumbbells activate stabilizer muscles that don’t engage when using fixed machines. This builds functional strength you can use in daily life. A beginner using dumbbells for chest presses engages not just the chest, but the shoulders, triceps, and core stabilizers simultaneously.
How to use them correctly:
- Dumbbell Chest Press (Beginner Start): 3 sets of 8–10 reps, 60 seconds rest between sets. Lie flat on a bench or sturdy surface, hold dumbbells at shoulder height with elbows at 45 degrees, press up explosively, and lower slowly over 2 seconds. Form cue: Keep your shoulder blades pinned to the bench; don’t let them shrug up toward your ears.
- Dumbbell Rows (Beginner Start): 3 sets of 8–10 reps per arm, 60 seconds rest. Hinge at hips with a slight knee bend, let dumbbells hang, pull one dumbbell toward your hip while keeping your elbow tight to your ribcage, lower, then repeat on the opposite side. Form cue: Don’t twist your torso; rotate only at the shoulder.
- Dumbbell Goblet Squats (Beginner Start): 3 sets of 12 reps, 90 seconds rest. Hold one dumbbell vertically at chest height, lower into a squat until thighs are parallel to the ground, press through heels to stand. Form cue: Keep your chest upright and weight in your heels—don’t let your knees cave inward.
Recommended investment: A quality adjustable dumbbell set ranges from $150–$400 for a pair (5 lbs to 50 lbs). Brands like Bowflex SelectTech and PowerBlocks are industry standards backed by the American College of Sports Medicine (ACSM).
2. Resistance Bands: Maximum Versatility, Zero Setup
Resistance bands are the most underrated accessory in beginner fitness. Unlike dumbbells, which feel heavy from the start, bands provide variable resistance—they get progressively harder as you stretch them. This means the hardest part of the movement (when you’re strongest) receives the most tension, leading to faster muscle activation and fewer injuries from form breakdown.
The American College of Sports Medicine found that resistance band training produces nearly identical strength gains to free weights, with the added benefit of reduced joint stress. For beginners with existing shoulder pain, knee issues, or general joint sensitivity, bands are often the smarter starting point.
How to use them correctly:
- Banded Bicep Curls: 3 sets of 12 reps, 45 seconds rest. Stand on the center of the band with feet hip-width apart, hold the other end of the band in each hand (palms forward), curl both hands toward shoulders, lower with control. Form cue: Keep your elbows locked at your sides throughout the movement—don’t let them drift forward.
- Banded Chest Flyes: 3 sets of 10 reps, 60 seconds rest. Loop the band around a sturdy object at chest height, step away to create tension, press forward with a slight arc in your elbows as if hugging a tree, return to start. Form cue: The band should feel tight at the end of each rep—if it’s slack, step farther away.
- Banded Lateral Walks (Glute Activation): 3 sets of 15 reps per direction, 45 seconds rest. Place band around your legs just above the knees, stand with feet hip-width apart and a slight squat position, step laterally while keeping the band taut, then return. Form cue: Keep your chest up and don’t let your knees collapse inward—that’s when the glutes stop working.
Pro recommendation: Invest in a set of loop bands with varying resistance levels (light, medium, heavy) for $20–$50 total. Pair them with Aura Heaven, which carries premium resistance bands ideal for progressive training.
3. Yoga Mat: Safety and Stability Foundation
A quality yoga mat is foundational—not optional. It protects your spine during floor-based exercises, provides grip during standing movements, and defines your workout space whether you’re training at home or at the gym. Many beginners skip this thinking it’s unnecessary, but slipping during a plank or having your spine press directly into hard flooring can lead to pain that stops progress for weeks.
The mat should be at least 6 mm thick to provide adequate cushioning for your joints. Thicker isn’t always better—a 10 mm mat can feel unstable during standing exercises. The surface should have a textured, non-slip grip that works both when dry and when you’re sweating.
How to use it correctly:
- Use it for all floor exercises: Planks, dead bugs, mountain climbers, leg raises—any movement where your hands, knees, or back touch the ground. This reduces spinal compression and prevents grip slipping that compromises form.
- Use it for stretching and recovery: 10 minutes of post-workout stretching on a mat is dramatically more effective than on bare floor because you’re not bracing against hard surfaces, which restricts your range of motion.
- Define your workout space: Lay the mat out before you start. This creates a psychological boundary that signals to your brain it’s training time, increasing focus and consistency.
Material matters: Look for non-toxic TPE (thermoplastic elastomer) or natural rubber mats. Avoid PVC mats, which off-gas harmful chemicals. Premium options from brands like Manduka or Liforme cost $60–$100 but last 10+ years. Budget-friendly alternatives ($25–$40) from Gaiam work fine for beginners starting their first 90 days.
4. Ab Roller: Core Strength Accelerator
The ab roller is deceptively simple yet devastatingly effective. It’s a wheel with handles that forces your entire core—rectus abdominis (six-pack), transverse abdominis (deep stabilizers), and obliques—to work together under extreme tension. For beginners, it’s the single most efficient tool for building visible core strength in the shortest time.
Research from the University of Delaware found that ab roller exercises activate the core 50% more intensely than standard crunches, which means faster results with fewer reps. When combined with proper form and consistent practice, beginners often report visible abdominal definition within 6–8 weeks of 3x per week training.
How to use it correctly (Critical for Safety):
- Ab Roller Knee Rollouts (Beginner): 3 sets of 6–8 reps, 90 seconds rest. Kneel on your yoga mat with the ab roller in front of you, hold the handles, roll forward slowly while keeping your core braced (as if someone’s about to punch your stomach), only roll as far as you can control, then roll back. Form cue: Your hips should move only when your core fails—if you feel your low back arching excessively before you can’t roll anymore, reduce range of motion. Never let your body sag toward the ground.
- Ab Roller Kneeling Rollouts (Intermediate): 3 sets of 8–10 reps, 75 seconds rest. Same form as beginner, but extend your range of motion further—roll out until your chest nearly touches the mat, then control the return. The extra range increases difficulty by 40%.
- Ab Roller Standing Rollouts (Advanced): 3 sets of 8–12 reps, 60 seconds rest. Stand upright, bend slightly at the waist, roll forward on the ab roller. This is dramatically harder because your entire body weight resists the movement. Only attempt this after 6+ weeks of consistent kneeling rollouts.
For complete core development, combine ab roller work with the How to Do the Dead Bug Exercise Correctly: Complete Form Guide 2024, which targets stabilizer muscles the roller doesn’t hit.
Equipment investment: A quality ab roller costs $25–$60. Look for models with thick, comfortable handles and a sturdy wheel that doesn’t wobble. The Fitness Master Ab Roller Trainer is an excellent beginner option combining affordability with durability.
| Level | Sets | Reps / Duration | Rest | Range of Motion |
|---|---|---|---|---|
| Beginner | 3 | 6–8 reps | 90 sec | Partial (chest to knee distance) |
| Intermediate | 3 | 8–10 reps | 75 sec | Full (chest near mat) |
| Advanced | 3–4 | 8–12 reps | 60 sec | Full, standing position |
5. Lifting Straps: Grip Strength Builder
Lifting straps are the beginner’s secret advantage. They wrap around your wrist and the barbell, allowing you to lift heavy without grip fatigue limiting your performance. Here’s why this matters: your grip muscles fatigue before your target muscles do. This means you might quit a back exercise because your hands are tired, not because your back couldn’t handle more work. Straps solve this problem, letting you focus purely on the movement.
According to the American Council on Exercise, using lifting straps allows beginners to increase training volume by 25–30% in upper body pulling exercises, which translates to faster muscle growth in the back, shoulders, and arms. This is especially valuable in the first 4–6 weeks when establishing proper form is more important than going heavy.
How to use them correctly:
- Barbell Rows with Straps: 4 sets of 8–10 reps, 90 seconds rest. Wrap straps around your wrists and under the barbell (not over—under), create tension by pulling the straps tight before lifting, perform the row with focus on squeezing your back muscles, not your hands. Form cue: If you feel the straps loosening mid-rep, your grip didn’t wrap tight enough.
- Deadlifts with Straps: 4 sets of 6–8 reps, 2 minutes rest. Use straps only as you progress beyond 225 lbs (or your 10-rep max). Beginners starting lighter should practice grip strength first without straps. When you do use them, wrap the barbell once, then grip it firmly. Form cue: Never use straps on light warm-up sets—your grip needs regular work.
- Lat Pulldowns with Straps: 3 sets of 10–12 reps, 60 seconds rest. Loop straps through the bar or rope handle, wrap around your wrists, pull down focusing on feeling the lat muscles stretch and contract rather than gripping hard. Form cue: Straps should feel snug but not cutting off circulation—if your hands feel numb, loosen them.
Investment: Premium lifting straps cost $15–$30 from brands like Rogue or EliteFTS. Basic cotton straps work fine for beginners at $10–$15. Cotton offers better grip security than neoprene for learning lifters.
6. Knee Sleeves: Joint Protection and Stability
Knee sleeves are compression gear that wraps around your knees, providing warmth, proprioceptive feedback (your brain’s sense of where your knees are in space), and subtle support. They’re not braces—they don’t prevent movement. Instead, they increase blood flow and signal your stabilizer muscles to engage more fully.
A study published in the Journal of Strength and Conditioning Research showed that athletes wearing knee sleeves during squats and lunges experienced 18% greater muscle activation in the vastus medialis (inner quad) and 12% reduced knee pain during high-rep sets. For beginners learning squats for the first time, this can be the difference between crisp form and compensation patterns that create injury risk.
How to use them correctly:
- Wearing them properly: Knee sleeves should sit centered over the knee joint, not too high (above the patella) or too low (below the joint line). Compression should feel supportive but not restrictive—you should be able to fit one finger under the sleeve comfortably.
- Squats with knee sleeves: 4 sets of 10–12 reps, 90 seconds rest. The sleeves improve proprioception, so you’ll notice better form immediately. Keep all other cues the same—knees tracking over toes, chest upright, weight in heels. Form cue: The sleeves are a tool, not a crutch. Don’t increase weight beyond what you could handle before using them—use them to refine form and build durability.
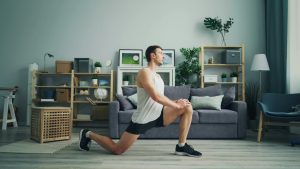
- Lunges with knee sleeves: 3 sets of 10 reps per leg, 60 seconds rest. The sleeves prevent the wobbling sensation some beginners feel in single-leg movements, improving stability and confidence. Step forward, lower until back knee taps the ground, press through front heel to stand. Form cue: Don’t let your front knee drift inward—the sleeve gives you immediate feedback if it does.
Material and investment: Neoprene knee sleeves are standard and cost $30–$70 per pair. Thicker sleeves (7 mm) provide more warmth and support but can feel restrictive; 5 mm is ideal for beginners. Look for sleeves with reinforced stitching and non-slip grip.
7. Foam Roller: Recovery and Mobility Tool
Foam rolling has exploded in popularity—and for good reason. According to Mayo Clinic, foam rolling reduces muscle tension, increases blood flow, and improves range of motion when done correctly. For beginners, it’s essential for preventing the delayed-onset muscle soreness (DOMS) that discourages people from returning to the gym after their first week.
The mechanism is simple: rolling breaks up tight fascia (connective tissue surrounding muscles), triggers the parasympathetic nervous system (your body’s recovery mode), and prepares muscles for the next session. A 60-second foam roll of each major muscle group after training reduces next-day soreness by 25–30%.
How to use it correctly:
- Quadriceps foam rolling: 60 seconds per leg, gentle rolling motion. Sit on your hands behind you, place the foam roller under one thigh, roll from knee to hip in slow, controlled motions (about 1 inch per second). If you find a tender spot, pause and rest on it for 10 seconds—don’t roll over it aggressively. Form cue: Keep your core engaged so your back doesn’t hyperextend. This is recovery work, not pain tolerance training.
- Hamstrings foam rolling: 60 seconds per leg. Sit upright with the roller under both hamstrings, use your hands to lift your hips slightly off the ground, roll from knees to glutes. If one leg is tighter, cross the other leg over it to increase pressure. Form cue: Move slowly and breathe deeply—your nervous system needs to relax for the foam roll to actually reduce tension.
- Back (Thoracic spine) foam rolling: 90 seconds. Lie on the foam roller positioned perpendicular to your spine at mid-back height, support your head with your hands, roll from mid-back to shoulder blade level (avoid the lumbar spine). Move only 1 inch per second. Form cue: Never roll directly on your spine—only on the muscle tissue to either side.
Timing and frequency: Foam roll for 5–10 minutes after every workout, or separately on rest days. The best beginner foam roller is 36 inches long, 6 inches in diameter, medium density (not soft, not super firm) and costs $20–$40. Avoid small rollers or extreme density variations—they’re either ineffective or too aggressive for someone learning the technique.
8. Jump Rope: Cardio and Conditioning
Jump rope is the most underestimated cardio tool for beginners. It requires zero setup, costs $15–$30, works in any space, and delivers cardiovascular benefits equivalent to running—but without the impact on joints that concerns many older beginners. According to research from the American College of Sports Medicine, 10 minutes of jump rope conditioning 3x per week improves cardiovascular fitness by 15% within 4 weeks and burns 10–15 calories per minute.
Beyond the cardiovascular benefit, jump rope builds explosive power in your calves and stabilizer muscles in your feet and ankles, improving balance and coordination. This translates directly to better performance in resistance training—compound movements like squats and deadlifts are easier when your ankle stability improves.
How to use it correctly:
- Jump Rope Beginner Intervals: 6 sets of 30 seconds jumping, 90 seconds walking rest. Use a smooth, continuous rope (not a beaded rope—harder to control). Jump only 1–2 inches off the ground with your wrists generating most of the rotation, not your arms. Land on the balls of your feet, not flat-footed. Form cue: Keep your shoulders relaxed and arms at your sides with minimal movement. If your shoulders are bouncing, you’re working too hard and will burn out within 2 minutes.
- Jump Rope Intermediate Intervals: 8 sets of 45 seconds jumping, 60 seconds walking rest. After 2–3 weeks, increase duration. At this point, try alternating single jumps (both feet together) with high knees (lifting knees to chest height). Form cue: Maintain a rhythm where you can talk in short sentences—if you can’t, you’re going too fast.
- Jump Rope Advanced Intervals: 10 sets of 60 seconds jumping with only 30–45 seconds walking rest. Introduce double-unders (two rotations per jump)—only if you’ve mastered single jumps consistently. Form cue: Double-unders use more wrist snap and less arm movement than single jumps.
Rope selection: For beginners, a speed rope with an adjustable length is ideal—$20–$40 from brands like Crossrope or Rogue. The rope should barely touch your head when you stand on the center with the handles at hip height.
9. Resistance Loop Bands: Progressive Overload Partner
Resistance loop bands (also called booty bands or mini loop bands) are distinct from longer resistance bands. They’re smaller, continuous circles of latex or fabric that provide 10–100+ lbs of resistance depending on thickness. For beginners, they’re perfect for progressive overload—incrementally increasing training stimulus—without the complexity of adding weight to barbells.
The NSCA recommends progressive overload as the single most important factor for continued muscle growth and strength gains. Loop bands offer a dead-simple way to do this: wrap one band around your legs and perform glute exercises (squats, hip thrusts, deadlifts) with increased resistance. The band resists throughout the entire range of motion, not just at the hard part, which means constant tension and faster results.
How to use them correctly:
- Glute Bridge with Loop Band: 3 sets of 15 reps, 60 seconds rest. Loop the band around your thighs just above the knees, lie on your back with knees bent and feet flat, press through heels and squeeze glutes to lift hips until your knees-hips-shoulders form a straight line, lower without fully relaxing. Form cue: Push your knees
Get Free Weekly Workout Plans
Join Coach Alex every week for:
✅ Proven home workout plans ✅ Nutrition tips ✅ Gear reviews