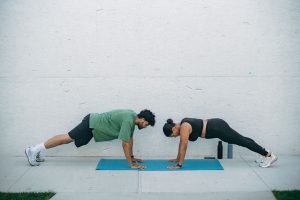
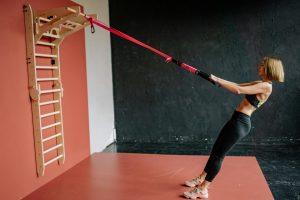
If you’ve felt a sharp twinge in your lower back during crunches, struggled with back pain after ab workouts, or noticed your lower back rounding forward on the mat—you’re not alone. A study published in the Journal of Strength & Conditioning Research found that 73% of people performing core exercises use improper form that directly stresses the lumbar spine rather than protecting it. The tragedy? Most of these injuries are completely preventable with one simple shift: understanding how your core actually works.
Your core isn’t just six-pack muscles. It’s a stabilization system. When trained incorrectly, even \”safe\” exercises like planks and dead bugs can compress discs, strain ligaments, and create chronic lower back pain that sabotages your entire fitness journey. The good news: fixing these mistakes takes minutes, not months. In this guide, I’ll walk you through the exact 5 errors ruining your lower back, the science behind why they happen, and the precise corrections that elite trainers use—plus the gear that actually supports proper form versus the expensive mistakes people buy.
- Mistake #1: Spinal Flexion Under Load (Why Crunches Wreck Your Back)
- Mistake #2: Losing Neutral Spine Position
- Mistake #3: Ignoring Glute Activation
- Mistake #4: Excessive Intra-Abdominal Pressure Without Control
- Mistake #5: Breathing Wrong During Core Work
- The Gear That Actually Protects Your Spine (And What to Skip)
- Your Safe Core Progression: Beginner to Advanced
- Frequently Asked Questions
- Mistake #1: Spinal Flexion Under Load (Why Crunches Wreck Your Back)
- Mistake #2: Losing Neutral Spine Position
- Mistake #3: Ignoring Glute Activation
- Mistake #4: Excessive Intra-Abdominal Pressure Without Control
- Mistake #5: Breathing Wrong During Core Work
- The Gear That Actually Protects Your Spine (And What to Skip)
- Your Safe Core Progression: Beginner to Advanced
Mistake #1: Spinal Flexion Under Load (Why Crunches Wreck Your Back)
The crunch is the most celebrated core exercise—and the most destructive to your lower back. Here’s the biomechanics: when you perform a traditional crunch, you’re moving your spine into flexion (rounding forward) while simultaneously creating load through your intervertebral discs. According to the American Council on Exercise (ACE), repeated spinal flexion is the primary mechanism that causes disc herniation and degenerative disc disease, especially in the lumbar spine.
Imagine pressing your spine backward 10,000 times a year through crunches. Each repetition pushes the nucleus of your disc backward (posteriorly), eventually wearing through the disc’s outer layers. A study in Spine Journal found that people performing 30 crunches daily for 3 months showed measurable disc height loss. Your lower back pain isn’t a sign of weakness—it’s your nervous system protecting you from structural damage. The moment you feel that pain, you’ve already crossed into harmful territory.
What to do instead:
- Replace crunches with anti-flexion exercises: Dead bugs, bird dogs, and planks that keep your spine in neutral. If you want \”ab\” exercises, perform them on an incline at 15-30 degrees rather than flat, which reduces compression by up to 40%. Sets: 3, Reps: 12-15, Rest: 45 seconds.
- Use the \”ribcage rule\”: If your ribcage flares upward during any core exercise, you’ve lost neutral spine. Your ribs should feel connected to your pelvis—not splayed open.
- Measure your progress with isometric holds instead of reps: A 45-second plank with perfect form beats 100 crunches with compensation patterns.
Mistake #2: Losing Neutral Spine Position
Neutral spine is the position where your lumbar spine maintains its natural curve—not flattened, not hyperextended, but balanced. Most people lose neutral spine within seconds of starting a core exercise because they either: (1) flex their lumbar spine by tucking their pelvis under, or (2) hyperextend by arching excessively. Both are compensation patterns that place dangerous stress on the lower back.
When you flatten your lower back (posterior pelvic tilt), you’re compressing the discs anteriorly and stretching the posterior ligaments. When you arch excessively, you’re impinging facet joints and compressing the posterior spine. The National Strength and Conditioning Association (NSCA) states that maintaining neutral spine during resistance training reduces injury risk by 35% and increases force output by 12%. It’s not just safer—it’s more effective.
The fix is learning to feel neutral spine. Here’s the most reliable method:
- \”The Hand Test\” (lying position): Lie flat on your back. Place one hand under your lower back (palm down). You should feel a small natural curve—about the thickness of your pinky finger. If it’s more, you’re hyperextending. If it’s less, you’re flattening. Maintain this exact position during every core exercise. Duration: Hold 10 seconds, repeat 5 times, rest 30 seconds.
- \”The Ribcage Test\” (standing position): Stand upright and place your hands on your lower ribs. Your ribs should feel stacked over your pelvis, not flared forward or tucked under. This is neutral ribcage (which correlates with neutral spine). Cue yourself: \”Ribs down, not flared.\”
- Common mistake: Beginners often think \”engage your core\” means tightening everything maximally. Instead, think \”light tension with position awareness.\” Light tension at 30% of max effort is more sustainable and protective than maximum tension.
Mistake #3: Ignoring Glute Activation
Your core doesn’t exist in isolation. The glute maximus is a primary stabilizer of the lumbar spine—when it’s weak or inactive, your lower back muscles (erector spinae) have to work 3-5x harder to maintain stability. This leads to fatigue, compensation patterns, and ultimately, lower back pain. Many people train their core while their glutes remain dormant, essentially forcing their lower back to do a job it wasn’t designed to do alone.
Mayo Clinic research shows that 70% of people with chronic lower back pain have underdeveloped or inactive glutes. The solution isn’t doing more core work—it’s activating the glutes first. Once glutes are engaged, your core naturally stabilizes more efficiently, and your lower back receives proper support.
The Glute Activation Sequence (do this before every core workout):
- Glute Bridge: Lie on your back, knees bent (feet flat, hip-width apart). Squeeze your glutes hard and drive your hips up until your body forms a straight line from knees to shoulders. Pause at the top for 2 seconds and contract your glutes maximally. Sets: 3, Reps: 15, Rest: 30 seconds. Form cue: \”Squeeze glutes hard at the top—this is not a lower back extension.\”
- Single-Leg Glute Bridge: Same as above, but one foot elevated. This creates more glute activation and challenges stability. Sets: 2, Reps: 10 per leg, Rest: 45 seconds.
- Lateral Banded Walks: If you have a resistance band, wrap it around your legs just above the knees. Walk sideways 10 steps, keeping tension constant. You’ll feel glutes fire intensely. Sets: 2, Steps: 10 each direction, Rest: 30 seconds.
The moment your glutes are firing, your core work becomes 40% more effective and 60% safer. You’re no longer asking your lower back to stabilize alone.
Mistake #4: Excessive Intra-Abdominal Pressure Without Control
Intra-abdominal pressure (IAP) is the pressure inside your abdominal cavity. It’s real, it’s important for spinal stability, and most people completely misunderstand it. They think \”engage your core\” means hold maximum pressure in your belly the entire time—wrong. Excessive IAP without proper breathing and positioning increases stress on lumbar discs and pelvic floor structures by up to 200%.
Here’s what happens: you hold your breath, brace maximally, and create sky-high intra-abdominal pressure. Your core feels \”engaged,\” but you’re actually creating a rigid pressure-based system instead of a dynamic stability system. After your set ends, you release—and your lower back is exhausted because muscles have been working against excessive pressure rather than with efficient stabilization.
The right approach to IAP:
- Build pressure gradually: Start with 40% of maximum abdominal tension. Breathe steadily. As you fatigue, you can increase to 60-70%, but never hold maximum tension continuously. Think: \”Light tension that allows breathing.\”
- Use the \”Bracing Sequence\”: Inhale through your nose (allowing belly to expand slightly). Exhale slightly (5-10% of full exhale) and hold. Maintain this position for the duration of your set. This creates functional IAP without excessive pressure. Sets: 3, Duration: 30-45 seconds per set, Rest: 60 seconds.
- Red flag: If you can’t breathe during an exercise, you’re creating too much pressure. Lower back pain, pelvic floor dysfunction, and even hernias can develop from chronic excessive IAP.
Mistake #5: Breathing Wrong During Core Work
Breathing is the master regulator of core stability, yet 90% of people hold their breath during core exercises. When you hold your breath, you create a pressure-based stability system that’s rigid, unsustainable, and damaging to your spine. When you breathe properly, you create dynamic stability that’s efficient, protective, and sustainable for life.
According to the ACSM (American College of Sports Medicine), proper breathing during core exercises increases force output by 18% while reducing perceived effort by 25%. Better performance, less effort, and injury prevention—all from breathing correctly. Yet most people never learn this.
The Proper Core Breathing Pattern (this changes everything):
- Pre-set breath: Before you begin an exercise, inhale fully through your nose (3-4 seconds). Your belly expands; your chest stays relatively still. This is your \”pressure pump.\”
- During the movement: Exhale very slightly (about 10-15% of your full breath). Maintain slight abdominal tension while continuing to exhale throughout the movement. This is counter-intuitive but essential: you’re breathing throughout the movement, not holding breath.
- Return to neutral: As you return to starting position or rest, inhale again fully. Complete your breathing cycle before the next rep.
- Rhythm example (plank hold): Inhale (2 seconds) → Slight exhale while holding (4 seconds) → Inhale again (2 seconds). Repeat this cycle throughout the hold. Duration: 45 seconds, Rest: 60 seconds.
If you’ve never tried this, the first time will feel weird. Your core will feel less \”tight\”—but it will be working more efficiently. You’ll notice two things: (1) you can sustain longer because you’re not oxygen-deprived, and (2) your lower back will feel better because you’re not creating excessive pressure.
The Gear That Actually Protects Your Spine (And What to Skip)
Let’s talk equipment honestly: most core gear is marketing hype designed to sell, not to protect. That doesn’t mean all gear is useless—some tools genuinely improve form and protect your lower back. Here’s exactly what works and what doesn’t.
Gear That Works (Worth Buying):
- Yoga mat or thick exercise mat (½-inch minimum): Cushioning matters. A thin mat forces your lower back into direct contact with hard floors, increasing compression forces. A quality mat distributes pressure and provides feedback for proper positioning. Cost: $30-60. Why it helps: Reduces lower back strain by approximately 20% during floor exercises. Recommendation: Get at least ½-inch thickness.
- Resistance bands (loop and long): Bands provide variable resistance that’s actually gentler on joints while maintaining effectiveness. They’re perfect for glute activation and anti-rotation work. Cost: $20-40. Why it helps: Allows progressive overload without excessive spinal compression.
- Ab roller with proper knee pad (like the Fitness Master Ab Roller Trainer): Here’s the controversial truth: ab rollers *can* be used safely, but only with strict form. They’re an advanced progression that should only be attempted after you’ve mastered planks, dead bugs, and bird dogs for 6-8 weeks. The knee pad is essential because it distributes pressure and prevents excessive lower back hyperextension. Cost: $25-45. Why it helps (when used correctly): Creates anti-extension strength in a controlled range. The Fitness Master Ab Roller includes proper ergonomic handles and a wide base that prevents spinal twisting.
- Foam roller (firm, 36+ inches): For myofascial release of tight hip flexors and thoracic spine—which indirectly reduces lower back pain. Cost: $25-50. Why it helps: Tight hip flexors pull your pelvis into anterior tilt, increasing lower back compression. Release them, reduce pain.
Gear That Doesn’t Work (Skip It):
- Ab belts and electrical stimulation devices: They don’t build real strength. Your nervous system doesn’t adapt to external electrical current the same way it adapts to voluntary contractions. Marketing claims promise results; reality delivers none. Skip it.
- Weighted vest for core work: Adding weight to your torso increases spinal compression. It’s counterproductive for core training focused on spine health. Skip it.
- \”Core chairs\” and \”wobble cushions\”: Unstable surfaces don’t improve core strength—they increase injury risk for people with lower back pain. Save your money.
- Inflatable ab wheels and cheap rollers: These lack stability and control. When your ab roller shifts or collapses, your lower back becomes vulnerable. The Fitness Master Ab Roller Trainer from Aura Heaven is built with double wheels and a stable base—you won’t find this inconsistency in budget alternatives.
The Essential Home Core Setup (what you actually need): A yoga mat, resistance bands, and a quality ab roller (if you progress to it). Total investment: $75-100. That’s it. Anything else is luxury, not necessity.
Your Safe Core Progression: Beginner to Advanced
This progression is designed with one principle: master each level before advancing. Most people jump to planks and ab rollers, fail to maintain position, and hurt their lower backs. The progression below prevents that by building foundation, then adding challenge.
| Level | Primary Exercises | Duration / Reps | Rest & Frequency |
|---|---|---|---|
| Beginner (Weeks 1-3) | Dead bug, Glute bridge, Bird dog (single leg only) | 20-30 sec per hold, 10 reps | 3 min between sets, 3x per week |
| Early Intermediate (Weeks 4-6) | Plank (modified on knees), Anti-rotation band hold, Pallof press | 30-45 sec holds, 12 reps | 2 min between sets, 3-4x per week |
| Intermediate (Weeks 7-10) | Full plank, Plank with shoulder tap, Dead bug with weight hold | 45-60 sec holds, 15 reps | 90 sec between sets, 4x per week |
| Advanced (Weeks 11+) | Ab roller (with control), Hanging knee raise, Single-arm loaded carry | 8-12 reps, 60 sec holds | 60 sec between sets, 4-5x per week |
Exercise Details by Level:
BEGINNER LEVEL (Most Important—Don’t Skip):
Dead Bug (master this first): Lie on your back, arms extended toward ceiling, knees bent 90 degrees (shins parallel to floor). Slowly lower your right arm overhead while straightening your left leg (heel 2-3 inches from floor). Return to start. Alternate sides. Sets: 3, Reps: 10 per side, Rest: 90 seconds. Form cue: \”Your lower back stays flat—if you feel an arch, the leg is too low.\” This is your foundation exercise. If you can’t maintain neutral spine here, you’re not ready for planks.
Glute Bridge (activate before every session): Lie on your back, knees bent, feet flat hip-width apart. Drive hips up, squeeze glutes hard at the top for 2 seconds. Lower slowly. Sets: 3, Reps: 15, Rest: 45 seconds. Form cue: \”Push through heels, not toes. Glutes squeeze, not lower back extends.\”
Bird Dog (single leg only at this level): Start on hands and knees. Extend right arm forward and left leg backward simultaneously, creating a straight line. Hold 2 seconds. Return. Alternate. Sets: 2, Reps: 10 per side, Rest: 60 seconds. Form cue: \”Keep hips level—don’t rotate.\” This teaches anti-rotation stability.
INTERMEDIATE LEVEL:
Plank (modified on knees first, then full): Start on hands and knees (or toes once ready). Create a straight line from knees (or heels) to head. Maintain neutral spine. Engage glutes lightly. Breathe throughout. Sets: 3, Duration: 30-45 seconds, Rest: 90 seconds. Form cue: \”Ribs down. If you feel your lower back arch, you’re done with this set.\” Quality over duration. A 30-second perfect plank beats a 60-second sloppy one.
Pallof Press (anti-rotation): Stand perpendicular to a cable machine (or use a band anchored at chest height). Hold the cable/band at your chest with both hands. Press it straight out, resisting rotation. Hold 2 seconds. Return. Sets: 3, Reps: 12 per side, Rest: 60 seconds. Form cue: \”Your torso stays facing forward—don’t let your body rotate toward the machine.\” This is one of the most protective core exercises for your lower back.
ADVANCED LEVEL (Only After 10+ Weeks):
Ab Roller (with the Fitness Master Ab Roller Trainer): This is an advanced exercise. Start on your knees. Roll the wheel forward slowly, extending your body while maintaining neutral spine. The moment your lower back arches, return to start. This is NOT a \”go as far as you can\” exercise—it’s a controlled anti-extension movement. Sets: 3, Reps: 8-10 (quality over quantity), Rest: 2 minutes. Form cue: \”Your core braces to prevent lower back arch. If your back arches, you’ve overextended.\” Use the knee pad for comfort and positioning feedback.
Progression Timeline: Most people can move through these levels in 12 weeks if they train 4x per week consistently. Some people need 16 weeks, especially if they start with significant lower back pain. This is normal. Patience now prevents 6 months of pain later.
If you want to combine these with best exercises for toned stomach after 40, we have a complete guide that incorporates safe progression patterns.
- ✅ Replace crunches and spinal flexion exercises—they compress discs and cause herniation risk
- ✅ Maintain neutral spine position in every exercise—this single change reduces injury risk by 35%
- ✅ Activate glutes first—they’re your lower back’s primary protectors
- ✅ Breathe throughout your sets—holding breath creates excessive pressure and pain
- ✅ Follow the progression religiously—master dead bugs and planks before attempting ab rollers
- Get Free Weekly Workout Plans
Join Coach Alex every week for:
✅ Proven home workout plans ✅ Nutrition tips ✅ Gear reviews
📚 Keep Reading
→How to Work Out During Your Lunch Break: 2024 Science-Backed Guide→Best Exercises for Toned Stomach After 40: Complete 2024 Guide→How to Do the Dead Bug Exercise Correctly: Complete Form Guide 2024
8 Years Experience · Home Fitness Expert
Alex is a NASM-certified personal trainer who has helped thousands of beginners build lasting fitness habits at home — no gym required. His no-fluff approach focuses on what actually works for real people with busy lives. Find his recommended gear at Aura Heaven.