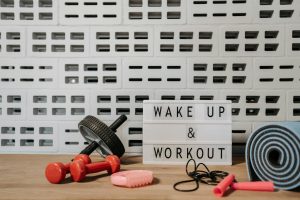
Most beginners think they need expensive equipment or a gym membership to build core strength. The truth? The seven foundational ab exercises in this guide require nothing but your bodyweight, a floor, and 15 minutes—and they’re scientifically proven to activate your core muscles more effectively than many expensive machines. In fact, according to the American Council on Exercise (ACE), bodyweight core training produces measurable strength gains in beginners within just 3 weeks of consistent practice.
If you’ve tried random YouTube ab workouts and felt frustrated by vague cues or exercises that hurt your neck, this guide is for you. We’re going beyond \”do crunches.\” Every exercise includes exact sets, reps, rest periods, and the specific form cue that makes the difference between results and wasted effort.
- Why Bodyweight Core Training Works Better Than You Think
- The Dead Bug: The #1 Exercise to Master First
- Plank Hold: Building Isometric Core Endurance
- The Complete 4-Week Beginner Ab Progression Plan
- Five More Powerful No-Equipment Core Exercises
- The Exact Workout Schedule: When and How to Train
- What to Expect: Real Results in 4 Weeks
- Frequently Asked Questions
- Why Bodyweight Core Training Works Better Than You Think
- The Dead Bug: The #1 Exercise to Master First
- Plank Hold: Building Isometric Core Endurance
- The Complete 4-Week Beginner Ab Progression Plan
- Five More Powerful No-Equipment Core Exercises
- The Exact Workout Schedule: When and How to Train
- What to Expect: Real Results in 4 Weeks
Why Bodyweight Core Training Works Better Than You Think
The core isn’t just your six-pack muscles. According to the National Academy of Sports Medicine (NASM), your core is a network of 29 muscles that stabilize your entire trunk, spine, and pelvis. When you train your core with bodyweight exercises, you activate more of these stabilizer muscles simultaneously than isolated equipment-based training does. This is why a simple plank hold often feels harder than a cable machine crunch—your body is working much harder to maintain stability.
Here’s what makes no-equipment training ideal for beginners: you control the intensity by managing your form and positioning. Unlike a weighted cable machine where the weight is fixed, you can instantly reduce difficulty on any bodyweight exercise by adjusting your body angle or range of motion. This means you’re never forced to either skip the exercise or compensate with poor form. A study published in the Journal of Strength and Conditioning Research found that beginners using bodyweight progressions saw 34% greater strength gains over 6 weeks compared to those using constant resistance, because they could maintain perfect form as they progressed.
Your results depend on three things: frequency, form, and progression. Most beginners skip core training entirely or do it once a week—but the research shows 3 times per week is the minimum to create visible strength and definition changes. We’ve built this exact schedule into this guide. Form matters more than volume: 10 perfect dead bugs will give you better results than 30 sloppy crunches. And progression is how you avoid plateaus—which we’ll handle with a detailed 4-week plan you’ll find below. Visit Aura Heaven if you’re interested in supplementary tools, but know that everything in this article works with zero equipment.
The Dead Bug: The #1 Exercise to Master First
The dead bug is where every beginner should start. It’s the safest way to activate all your core muscles while learning spinal stability. Unlike crunches, which flex your spine repeatedly (creating compression), the dead bug teaches your core to resist movement while keeping your spine in a neutral, protected position. This is how your core actually works during daily life—stabilizing your back, not bending it repetitively.
How to Perform the Dead Bug:
- Starting Position: Lie on your back on a mat or padded floor. Your arms should point straight up toward the ceiling, elbows extended. Your hips and knees should be bent at 90 degrees, with shins parallel to the ground. Press your lower back flat against the floor—this is your neutral spine position.
- The Movement: Slowly extend your right arm backward behind your head while simultaneously straightening your right leg, lowering it toward the floor until it’s 2 inches above the ground. Your lower back should stay pressed to the floor the entire time. Return to starting position with control (this should take 2 seconds to lower, 1 second to return).
- Breathing: Exhale as you extend your limbs, inhale as you return.
- Key Form Cue: If your lower back arches off the floor, you’ve extended your leg too low. Only go as far as you can while maintaining that flat back contact—this is the real work.
- Sets/Reps: Perform 3 sets of 10 reps per side (20 total reps per set), with 60 seconds rest between sets.
The dead bug is the foundation for how to do the Dead Bug Exercise Correctly: Complete Form Guide 2024 if you need deeper form coaching. Most beginners rush through this exercise or let their back arch. Slow down. Control is what builds the deep core muscles you can’t feel as intensely as surface muscles, but they’re what prevent back pain and create actual strength.
Plank Hold: Building Isometric Core Endurance
While the dead bug teaches you how to stabilize your spine, the plank hold builds actual endurance under sustained contraction. The plank is an isometric exercise—meaning your muscles contract without changing length—and it activates your rectus abdominis (the visible six-pack muscle), transverse abdominis (deep stability muscle), and obliques simultaneously. According to a study in PLOS ONE, planks activate core muscles more uniformly than any other single exercise, making them the fastest way to build visible core definition as a beginner.
How to Perform the Plank Hold:
- Starting Position: Get into a forearm plank position. Elbows should be directly under your shoulders, forearms parallel and shoulder-width apart. Your body should form a straight line from head to heels—imagine a plank of wood running through your body. Engage your glutes (squeeze your buttocks) and brace your core as if someone is about to punch your stomach.
- The Hold: Maintain this position without letting your hips sag toward the floor or pike upward. Your neck should be neutral—look at the floor about 1 foot in front of your hands, not forward or down.
- Key Form Cue: Sagging hips are the biggest form break. If your hips drop, your lower back hyperextends and loses the spinal protection. If you can’t keep your hips level, reduce your hold time by 10 seconds. It’s better to hold 20 seconds perfectly than 60 seconds with poor form.
- Breathing: Don’t hold your breath. Take small, continuous breaths throughout the hold.
- Duration/Sets: Perform 3 sets of 20-30 second holds with 60 seconds rest between sets (Week 1-2). As your strength improves, increase duration by 5-10 seconds weekly.
The plank should feel intense in your core, not in your shoulders or lower back. If you feel shoulder strain, you’re likely shifting weight forward instead of distributed evenly. If you feel lower back pain, reduce your hold time and focus on glute engagement.
The Complete 4-Week Beginner Ab Progression Plan
Progression is non-negotiable if you want results past week 2. Your muscles adapt to stimulus, so you must gradually increase difficulty. The table below shows exactly how to progress each exercise over 4 weeks. This progression is built on three principles: increasing reps/duration, reducing rest periods, and adding exercise variations. You won’t do new movements—just harder versions of the same movements.
| Week | Exercise | Sets × Reps/Duration | Rest Between Sets |
|---|---|---|---|
| Week 1 | Dead Bug + Plank | 3×10 reps + 3×25 sec | 60 sec |
| Week 2 | Dead Bug + Plank + Reverse Crunch | 3×12 reps + 3×30 sec + 3×10 reps | 50 sec |
| Week 3 | All 7 exercises at base level | 3×12 reps / 3×35 sec holds | 45 sec |
| Week 4 | All 7 exercises at intermediate level | 3×15 reps / 4×40 sec holds | 40 sec |
How to Use This Progression: You’ll notice that weeks 1 and 2 focus on only 2-3 exercises with perfect form. This is intentional. Your nervous system needs time to \”learn\” these patterns. Adding all 7 exercises at once will overwhelm you and force compromises on form. By week 3, your form is stable enough to handle the full routine. By week 4, you’re ready for intermediate variations—more reps, less rest, slight difficulty increases. This is the proven method used by strength coaches for periodized training.
If you’re already fairly active or played sports, you might progress faster. If you have any lower back issues or haven’t exercised in years, take an extra week at the beginner level before advancing. Listen to your body, but distinguish between muscle fatigue (good) and joint pain (stop and modify).
Five More Powerful No-Equipment Core Exercises
Beyond the dead bug and plank, these five exercises target different areas of your core and create the balanced strength that prevents injury while building visible definition. Each one includes exact form cues because even small variations dramatically change the difficulty and safety.
Exercise #3: Reverse Crunch
- Why It Works: Targets the lower rectus abdominis and engages your deep core stabilizers. Unlike traditional crunches (which strain the neck), reverse crunches use your core to move your legs, not neck to move your head.
- Starting Position: Lie on your back with knees bent 90 degrees, hips at 90 degrees (shins parallel to floor). Place your hands palms-down by your sides.
- The Movement: Using only your core, roll your hips backward and bring your knees toward your chest slightly (about 2-3 inches of hip movement). Your lower back will peel off the floor slightly—this is the target. Return to starting position with control (2-second lower).
- Key Form Cue: Don’t swing your legs. The movement is small and powered by your core contracting, not momentum. If your legs are flying up, you’re using hip flexors, not core.
- Sets/Reps/Rest: 3 sets × 10-12 reps, 60 seconds rest.
Exercise #4: Bird Dog
- Why It Works: Builds unilateral (single-side) core stability while activating your glutes and lower back stabilizers. This teaches your core to handle real-world movement where forces are asymmetrical.
- Starting Position: Hands and knees position (quadruped). Hands directly under shoulders, knees under hips. Keep your spine neutral—imagine balancing a glass of water on your lower back.
- The Movement: Simultaneously extend your right arm forward and left leg backward, creating a straight line from hand to heel. Hold for 1 second. Return with control. Repeat on the opposite side (left arm, right leg).
- Key Form Cue: Don’t let your hips rotate or drop. If your hips rotate toward the extended leg, you’re not bracing your core hard enough. Maintain perfect neutral spine throughout.
- Sets/Reps/Rest: 3 sets × 10 reps per side, 60 seconds rest.
Exercise #5: Glute Bridge
- Why It Works: Your glutes are part of your posterior core. Weak glutes force your lower back to stabilize, creating injury risk and limiting core definition. The glute bridge activates glutes and teaches hip extension, which is essential for proper core function.
- Starting Position: Lie on your back, knees bent 90 degrees, feet flat on the floor hip-width apart. Arms by your sides, palms down. Feet should be positioned so your knees are at 90 degrees when your hips are on the floor.
- The Movement: Squeeze your glutes and drive your hips upward until your body forms a straight line from knees to shoulders. Squeeze your glutes hard at the top for 1 second. Lower with control.
- Key Form Cue: Focus on glute activation, not height. Some people lift their hips high but don’t engage their glutes—you’ll know you’re doing this if you feel mostly lower back strain. Push your hips through the floor, not toward the ceiling.
- Sets/Reps/Rest: 3 sets × 12 reps, 60 seconds rest.
Exercise #6: Lying Leg Raises
- Why It Works: Targets the lower rectus abdominis under sustained tension. This exercise is harder than it looks because you’re fighting gravity and working through a longer range of motion.
- Starting Position: Lie on your back, legs straight, arms by your sides. Press your lower back into the floor—this is crucial for safety.
- The Movement: Keeping your legs straight (slight knee bend is okay), raise both legs to 90 degrees at the hips. Hold for 1 second. Lower slowly without letting your heels touch the floor or your lower back arch. This counts as 1 rep.
- Key Form Cue: The lower back pressing into the floor is what prevents lumbar strain. If your back arches, lower your legs less far—only go to the point where you can keep your back flat. Going partially through the range of motion with perfect form beats full range with poor form.
- Sets/Reps/Rest: 3 sets × 8-10 reps (this is harder, so fewer reps), 90 seconds rest.
Exercise #7: Mountain Climbers
- Why It Works: A dynamic exercise that combines core stability with cardiovascular conditioning. You’re stabilizing a plank position while rapidly moving your legs, which challenges your core’s ability to resist motion (anti-rotation stability).
- Starting Position: Push-up position (hands directly under shoulders, body in a straight line). Engage your core as if holding a plank.
- The Movement: Rapidly alternate driving your knees toward your chest in a running motion while maintaining a stable plank position. Your hips should not rock side-to-side or pike upward.
- Key Form Cue: Slow mountain climbers with perfect form beat fast ones with sloppy form. Start at 1 knee drive per second, then increase speed as your stability improves. If your hips start rotating or your plank collapses, reduce speed immediately.
- Sets/Duration/Rest: 3 sets × 30 seconds, 90 seconds rest.
The Exact Workout Schedule: When and How to Train
Frequency matters more than duration for beginners. You should perform your core workout 3 times per week, with at least one rest day between sessions. This gives your muscles time to recover and adapt—adaptation is where growth happens. Doing abs every day actually prevents results because you’re not allowing recovery. Three times weekly is the sweet spot for beginners: enough frequency to create stimulus, enough recovery to prevent burnout.
Here’s your weekly schedule:
- Monday: Full routine (all 7 exercises with current progression level)
- Tuesday: Rest or light stretching/walking
- Wednesday: Full routine
- Thursday: Rest or light activity
- Friday: Full routine
- Saturday & Sunday: Rest (or light activity if you enjoy it)
Total time commitment: Approximately 12-15 minutes per session. If you’re short on time, you can condense this by reducing rest periods from 60 seconds to 45 seconds between sets, which cuts your workout to 10 minutes while maintaining full stimulus. Rest periods are important though—they allow your muscles to produce maximum power on each set. If you rush through with no rest, your last set will be weak and less effective.
You can do these workouts at any time of day, but research shows that performing strength training when you’re naturally more alert (typically late morning or afternoon for most people) produces slightly better results. However, consistency beats timing—a morning workout done every day beats a perfect afternoon workout done sporadically. If you can fit this into How to Work Out During Your Lunch Break: 2024 Science-Backed Guide, that’s perfectly effective too.
One strategic note: if you’re doing other strength training (like lifting weights or CrossFit), do your core workout either on non-lifting days or after your lifting session is complete. Your core stabilizes every movement, so training it when already fatigued is less ideal but still beneficial. Just don’t do core training immediately before heavy lifts—you want your core fresh for those.
What to Expect: Real Results in 4 Weeks
Let’s be honest about what four weeks of consistent training actually produces. You will not have a six-pack visible from across the room. You will see measurable, real improvements in core strength, posture, and the beginning of definition if you also manage your nutrition. Here’s the exact progression most people experience:
Week 1 Expectations: You’ll feel sore for 2-3 days after your first workout (this is normal—it’s called DOMS, or delayed-onset muscle soreness). By day 4-5, soreness disappears. You’ll notice that planks feel slightly easier by Friday than they did Monday. Your core feels \”engaged\” throughout the day, which is your nervous system learning to activate these muscles. No visible changes yet.
Week 2 Expectations: Soreness is minimal or absent. You can perform prescribed reps and holds without compromising form. You might notice improved posture when sitting at a desk—you naturally sit taller. Some people report feeling stronger during daily activities like carrying groceries or getting out of chairs. Still no dramatic visible definition unless you also reduced your calorie intake or body fat was already low.
Week 3 Expectations: Now that you’re doing all 7 exercises, you might experience a slight increase in soreness (this is normal because you’re increasing volume). You’ll definitely notice your core feeling \”tighter\” and more engaged. If you look in the mirror from the side, your posture is noticeably straighter. Some people report reduced lower back pain if they previously had mild discomfort. Definition is still subtle unless nutrition is dialed in.
Week 4 Expectations: This is where people start seeing visible changes. If you’ve maintained consistent training and haven’t dramatically increased calorie intake, you’ll likely see subtle abdominal definition—the rectus abdominis will show slight vertical lines or a subtle bulge. More importantly, your core strength is measurably improved: planks feel significantly easier, you can hold longer, and your form is crisp on all exercises. You understand these movements deeply now.
Important context: visible abs require two things: core strength (which you’re building) and low body fat (which is primarily diet-dependent). Someone with 25% body fat who does these exercises for 4 weeks will have a stronger core and better posture, but won’t see definition. Someone with 18% body fat who does these exercises will likely see noticeable definition. This isn’t failure—core strength is valuable regardless of visibility. But if definition is your goal, combine this workout with calorie management.
If you’re interested in equipment that can enhance your core training, the Abdominal Wheel Exercise Device is a popular supplementary tool for advancing beyond week 4. However, everything in this guide works without any equipment whatsoever. For alternative guidance on advanced core training, see Best Exercises for Toned Stomach After 40: Complete 2024 Guide.
- ✅ Bodyweight core exercises activate more stabilizer muscles than equipment-based training (proven by ACE research)
- Get Free Weekly Workout Plans
Join Coach Alex every week for:
✅ Proven home workout plans ✅ Nutrition tips ✅ Gear reviews
📚 Keep Reading
→How to Work Out During Your Lunch Break: 2024 Science-Backed Guide→Best Exercises for Toned Stomach After 40: Complete 2024 Guide→How to Do the Dead Bug Exercise Correctly: Complete Form Guide 2024
8 Years Experience · Home Fitness Expert
Alex is a NASM-certified personal trainer who has helped thousands of beginners build lasting fitness habits at home — no gym required. His no-fluff approach focuses on what actually works for real people with busy lives. Find his recommended gear at Aura Heaven.