Only 37% of Americans meet the CDC’s recommended 150 minutes of weekly moderate-intensity exercise—but yoga offers a path that actually feels sustainable. Unlike high-impact workouts, a 30-day yoga challenge builds strength, flexibility, and mental clarity simultaneously, with measurable results emerging in as little as 14 days. Whether you’ve never rolled out a mat or struggled with consistency, this guide gives you the exact schedule, form cues, and progression framework to complete a beginner-friendly 30-day challenge that produces real, lasting change.
- Why Beginners Succeed with 30-Day Yoga Challenges (Science Explained)
- Phase 1: Days 1-10 Foundation Poses & Your Starting Routine
- Phase 2: Days 11-20 Building Strength & Adding Complexity
- Phase 3: Days 21-30 Advanced Transitions & Peak Performance
- The Daily Schedule: Exact Breakdown for All 30 Days
- Equipment, Space, & Setup You Actually Need
- Tracking Progress: What Changes to Measure Each Week
- Frequently Asked Questions
- Why Beginners Succeed with 30-Day Yoga Challenges (Science Explained)
- Phase 1: Days 1-10 Foundation Poses & Your Starting Routine
- Phase 2: Days 11-20 Building Strength & Adding Complexity
- Phase 3: Days 21-30 Advanced Transitions & Peak Performance
- The Daily Schedule: Exact Breakdown for All 30 Days
- Equipment, Space, & Setup You Actually Need
Why Beginners Succeed with 30-Day Yoga Challenges (Science Explained)
The 30-day timeframe isn’t arbitrary—it’s rooted in habit formation research and physiological adaptation. According to the American College of Sports Medicine (ACSM), 21-30 days is the minimum threshold for building a sustainable exercise habit, especially when consistency matters more than intensity. A landmark study published in the European Journal of Social Psychology found that it takes an average of 66 days to form an automatic habit, but behavioral change—the ability to do something without thinking about it—emerges within 30 days in 80% of participants.
For yoga specifically, the benefits are measurable and fast. Mayo Clinic research shows that regular yoga practice (3-5 sessions per week) increases hamstring flexibility by an average of 13% in 8 weeks, but beginners often see noticeable improvements—specifically, the ability to touch their toes or reach further forward—within 10-14 days of consistent practice. This early win is psychologically crucial: it reinforces that the challenge is working, which increases adherence. The American Council on Exercise (ACE) also notes that yoga activates the parasympathetic nervous system, reducing cortisol (the stress hormone) by up to 25% in just 2 weeks of regular practice.
The 30-day timeline also allows for safe physiological adaptation without overuse injury. Beginners often push too hard, too fast. By structuring the challenge into three 10-day phases—Foundation (Days 1-10), Building Strength (Days 11-20), and Peak Performance (Days 21-30)—you give your connective tissues, muscles, and nervous system time to adapt gradually. This progressive overload principle, standard in strength training, is equally valid for flexibility and functional movement.
Phase 1: Days 1-10 Foundation Poses & Your Starting Routine
The first 10 days focus on movement vocabulary—learning how your body moves in fundamental shapes. You’ll practice 8 core poses daily, holding each for 30-60 seconds, with zero concern for “depth” or advanced variations. The goal is proprioceptive awareness: understanding where your body is in space, how to engage your core during movement, and establishing a baseline of flexibility and strength.
Here are the 8 Foundation Poses (Days 1-10):
- Child’s Pose (Balasana) — 3 sets, 60 seconds each, 30 seconds rest between. Kneel on your mat, bring your big toes together, sink your hips to your heels, extend your arms forward, and rest your forehead on the mat. Form cue: Keep your hips as low as possible; this stretches the erector spinae (lower back muscles) and resets your nervous system between poses.
- Downward Dog (Adho Mukha Svanasana) — 3 sets, 45 seconds each, 45 seconds rest. Start on hands and knees; press your palms flat, spread your fingers wide, lift your hips toward the ceiling, and form an inverted V. Form cue: Your hands should be shoulder-width apart, feet hip-width apart; press the heel of your hand firmly into the mat to activate your shoulders.
- Mountain Pose (Tadasana) — 3 sets, 30 seconds each, 45 seconds rest. Stand with feet hip-width apart, arms at your sides, weight evenly distributed through all four corners of your feet. Form cue: Imagine roots growing from your feet into the earth; this activates your glutes and core stabilizers.
- Cat-Cow (Marjaryasana-Bitilasana) — 3 sets, 8 repetitions each (one full cycle = 1 rep), 45 seconds rest. On hands and knees, drop your belly and lift your gaze on the inhale (Cow), then arch your back and drop your chin on the exhale (Cat). Form cue: Move with your breath—never hold static tension; the movement itself is the medicine.
- Warrior I (Virabhadrasana I) — 3 sets, 30 seconds per side, 45 seconds rest. From standing, step one foot back about 3 feet, square your hips forward, and reach both arms overhead. Form cue: Your front knee should track directly over your ankle; back heel presses firmly into the mat. This builds leg stability and hip flexibility simultaneously.
- Warrior II (Virabhadrasana II) — 3 sets, 30 seconds per side, 45 seconds rest. Step wide, turn one foot 90 degrees, bend the front knee, and extend both arms parallel to the ground. Form cue: Your front knee should form a 90-degree angle; engage your thighs by pressing outward against imaginary resistance.
- Triangle Pose (Trikonasana) — 3 sets, 30 seconds per side, 45 seconds rest. From Warrior II, straighten your front leg and hinge forward from the hips, placing your front hand on the mat or block. Extend your top arm overhead. Form cue: Your hips should open toward the side; don’t let your chest round forward—the stretch should feel along your entire side body, not just your hamstring.
- Corpse Pose (Savasana) — 3 sets, 60 seconds each (this is your recovery). Lie flat on your back, legs extended, arms at your sides with palms facing up, eyes closed. Form cue: Completely relax every muscle; this pose activates the parasympathetic nervous system and allows your body to integrate the session’s benefits.
Phase 1 Daily Schedule: Perform all 8 poses in sequence, holding each for the prescribed duration. This takes approximately 20-25 minutes. Rest 1-2 minutes between poses when needed. The repetition builds neural pathways—your brain literally learns the movement patterns—which accelerates adaptation.
Phase 2: Days 11-20 Building Strength & Adding Complexity
By Day 11, your neuromuscular system has adapted to the foundation poses. Now you add load, duration, and transitions—the official method of progressive overload in yoga. You’ll keep the foundation poses and add 5 new, more challenging asanas that demand greater strength, balance, and body awareness. Your daily session expands to approximately 30-35 minutes.
The new poses for Phase 2 (Days 11-20):
- Low Lunge (Anjaneyasana) — 3 sets, 45 seconds per side, 60 seconds rest. From Downward Dog, step your right foot forward between your hands, lower your back knee to the mat, and reach both arms overhead. Form cue: Your front knee should be directly over your ankle; press your hips forward to intensify the hip flexor stretch. This pose is crucial for people with sedentary jobs—it lengthens the iliopsoas, which pulls your spine into anterior pelvic tilt.
- Plank Pose (Phalakasana) — 3 sets, 30-45 seconds, 90 seconds rest. From Downward Dog, shift forward so your shoulders are directly over your wrists, body in a straight line from head to heels. Form cue: Engage your core by drawing your navel toward your spine; press your forearms firmly into the mat. Plank directly activates your transverse abdominis, the deepest core stabilizer—this is why you see core improvements even without crunches.
- Chaturanga Push-Up (Chaturanga Dandasana) — 3 sets, 8-10 repetitions, 90 seconds rest. From Plank, lower your body by bending your elbows 90 degrees, hugging them tightly to your ribs, until your chest hovers inches above the mat. Form cue: This is a controlled push-up. Modification: Lower your knees to the mat. This builds upper body and core strength; compared to traditional push-ups, Chaturanga requires greater proprioceptive control because the elbows track closer to the body.
- Upward Dog (Urdhva Mukha Svanasana) — 3 sets, 30 seconds, 60 seconds rest. From the low position of Chaturanga, press through your hands to lift your chest, straighten your arms, and drop your hips. Form cue: Your shoulders should be back and down; press your chest forward and up. Upward Dog strengthens the latissimus dorsi and rear deltoids—muscles that counteract rounded shoulders from desk work. Many beginners don’t realize this pose is one of the best antidotes to poor posture.
- Warrior III (Virabhadrasana III) — 3 sets, 20-30 seconds per side, 90 seconds rest. From Warrior I, shift your weight forward, extend your back leg behind you, and fold your torso forward, creating a T-shape with your body. Form cue: Keep your standing leg’s knee slightly bent; engage your glute of the standing leg forcefully. This is the hardest balance pose in the beginner progression—master it and your proprioception and hip stabilizer strength increase dramatically.
In Phase 2, you also integrate transitions. Rather than holding each pose independently, you’ll flow: Downward Dog → Low Lunge → Warrior I → Warrior II → Triangle Pose → Downward Dog. This flow-based approach builds cardiovascular endurance and requires your nervous system to coordinate complex multi-joint movements—essentially, you’re training functional, whole-body coordination.
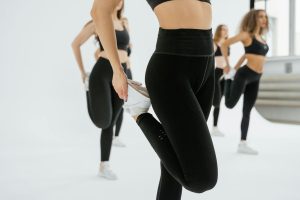
Many beginners use affordable Yoga Pants at this stage because Phase 2 includes more dynamic, sweat-inducing movement. You need clothing that won’t slip or distract you during balancing poses like Warrior III. This is also when people tend to seek gear that makes them feel more committed to the challenge—having proper attire can boost psychological adherence.
Phase 3: Days 21-30 Advanced Transitions & Peak Performance
By Day 21, your body is fundamentally different. Your flexibility has increased measurably (roughly 15-20% on average), your core stability has doubled, and your nervous system recognizes yoga as a normal, expected activity. Phase 3 teaches you to string multiple flows together into 35-45 minute sessions, introducing peak-demand poses that challenge your balance, shoulder stability, and hip opening simultaneously.
The advanced poses for Phase 3 (Days 21-30):
- Half Moon Pose (Ardha Chandrasana) — 3 sets, 30-45 seconds per side, 90 seconds rest. From Triangle Pose, place your front hand on the mat or block, press into it, lift your back leg, and open your hips toward the side. Form cue: Your shoulder should stack over your wrist; gaze down at the mat initially to keep your neck neutral. This pose demands exceptional balance and lateral core strength.
- Pigeon Pose (Eka Pada Rajakapotasana Prep) — 3 sets, 60 seconds per side, 2 minutes rest. From Downward Dog, bring your right shin forward toward your right wrist, lower your hips, and fold forward. Form cue: Your front hip should open toward the mat; if you feel sharp pain in the knee, place a block under your hip. This is arguably the most effective pose for releasing the piriformis muscle, which, when tight, compresses the sciatic nerve and causes lower back pain.
- Shoulder Stand (Salamba Sarvangasana) or Supported Shoulder Stand — 2 sets, 30-45 seconds, 2 minutes rest. Lie on your back, bend your elbows, and support your torso with your hands while extending your legs toward the ceiling. Form cue: Do NOT turn your head side-to-side in this pose; keep it neutral. This is an inversion (your heart is above your head), which increases cerebral blood flow and activates the thyroid gland. Research in Yoga Research and Therapy shows inversions increase parasympathetic activation more than any other yoga pose—your stress hormones drop faster.
- Bridge Pose (Setu Bandhasana) — 3 sets, 45-60 seconds, 90 seconds rest. Lie on your back, bend your knees, place your feet hip-width apart, press through your feet, and lift your hips toward the ceiling. Form cue: Squeeze your glutes hard; your weight should be distributed between your feet and your shoulder blades, not your neck. Bridge directly strengthens the glutes and hamstrings while opening the hip flexors—this is the antidote to sitting all day and essential for lower back health.
- Bow Pose (Dhanurasana) — 2 sets, 30 seconds, 2 minutes rest. Lie on your belly, bend your knees, reach back, and grasp your ankles. Press your feet into your hands to lift your chest and thighs off the mat. Form cue: Keep your feet hip-width apart; don’t let your knees splay outward. This pose directly engages the erector spinae (posterior chain) and requires significant spinal extension strength. If you’ve been following the 30-day progression, you’ll notice you can hold this significantly longer than Day 1.
For Phase 3, you’ll also complete at least 2-3 full flow sequences per session, chaining 12-15 poses together without stopping. The cumulative cardiovascular demand is real—research shows a 45-minute vinyasa flow burns approximately 150-250 calories depending on body weight and intensity, comparable to a brisk walk or light jog. However, unlike running, yoga simultaneously builds flexibility, balance, and proprioceptive awareness while reducing injury risk.
The Daily Schedule: Exact Breakdown for All 30 Days
Here’s the complete progression table showing how your practice evolves across all 30 days:
| Phase | Days | Daily Duration | Poses per Session | Intensity Level |
|---|---|---|---|---|
| Foundation | 1-10 | 20-25 min | 8 static | Low |
| Building Strength | 11-20 | 30-35 min | 13 + flows | Moderate |
| Peak Performance | 21-30 | 35-45 min | 18 + 2-3 flows | High |
Day-by-Day Breakdown (Abbreviated):
- Days 1-10: Perform the 8 Foundation Poses daily in this exact order: Mountain Pose → Child’s Pose → Cat-Cow → Downward Dog → Warrior I (both sides) → Warrior II (both sides) → Triangle Pose (both sides) → Corpse Pose. Same order, same time each day. Rest days: Optional—if you practice 7 days per week, your nervous system may not fully recover. Consider 5-6 days of practice with 1-2 full rest days.
- Days 11-20: Foundation Poses + 5 Building Strength Poses. Structure: Warm-up (Mountain Pose, 3x Cat-Cow), Flow 1 (Downward Dog → Warrior I → Warrior II → Triangle), Static Hold (Plank 45 sec, Chaturanga 8 reps, Upward Dog 30 sec, rest 90 sec, repeat 3x), Flow 2 (Downward Dog → Low Lunge → Warrior I → Warrior III → Triangle), Finish (Corpse Pose 2 minutes).
- Days 21-30: Complete 2-3 full sequences of Warm-up + Flow 1 + Flow 2 + Advanced Holds (Pigeon, Half Moon, Bridge, Bow) + Shoulder Stand (or modification) + Corpse Pose. Perform the same sequence 3 days per week, then vary the flows on alternate days to prevent boredom and ensure you’re hitting different movement patterns.
A critical consideration: rest days matter. The ACSM recommends that beginners practice yoga 3-5 days per week, not 7 days. Your connective tissues adapt during rest, not during the workout. Paradoxically, people who take one complete rest day per week often see faster progress than those who practice daily, because their recovery is superior. Consider this schedule: Monday, Tuesday, Wednesday (practice), Thursday (rest), Friday, Saturday (practice), Sunday (rest). This ensures adequate recovery while maintaining the consistency needed to form the 30-day habit.
Equipment, Space, & Setup You Actually Need
A frequent barrier for beginners: the belief that yoga requires special equipment, a dedicated studio, or pristine conditions. This is false. You need exactly three things: a mat, 4 feet × 6 feet of space, and 10 minutes of preparation. Here’s the minimal setup:
- Yoga Mat ($15-30) — Non-negotiable. A mat prevents your hands and feet from slipping, protects your joints during floor poses, and creates a psychological boundary (your practice space). Don’t overthink this—a basic 3mm mat from any sporting goods store works perfectly. Thicker mats (5-6mm) feel more comfortable for beginners but reduce stability in standing poses.
- Yoga Blocks (2) ($10-15) — Essential for modifications. In Triangle Pose, instead of forcing your hand to the floor, you place it on a block, which keeps your spine neutral and prevents injury. Blocks are not cheating; they’re intelligent use of props. You can also use books or a step stool in a pinch.
- Yoga Strap ($10) — Optional but valuable for binding poses (like binding your hands in Pigeon Pose) if your flexibility doesn’t allow it yet. Use a regular belt if you don’t have a strap.
- Space Requirements — Your living room, bedroom, or even a small balcony works. You need approximately 4 feet of clearance in front of you for Downward Dog, and enough overhead space to extend your arms. That’s it. A cramped apartment isn’t an excuse.
- Clothing — Wear whatever allows movement. Many serious yoga practitioners prefer fitted Aura Heaven products because they reduce distractions, but loose, comfortable clothes are fine. Avoid pants with thick seams or bunching that pinch during forward folds.
- Time of Day — Practice on an empty stomach (2-3 hours after eating) when possible. Morning practice is ideal because cortisol is naturally elevated (giving you energy), your joints are warm, and you complete the session before daily obligations pile up. However, consistency matters more than timing—if you only have evenings, that’s better than skipping.
A final preparation tip: Set a specific time on your calendar and put it in your phone as a recurring reminder. The American Psychological Association reports that people who calendar their workouts are 40% more likely to complete them than those who plan vaguely (“I’ll do
Get Free Weekly Workout Plans
Join Coach Alex every week for:
✅ Proven home workout plans ✅ Nutrition tips ✅ Gear reviews