Nearly 80% of people who do ab workouts at home are unknowingly damaging their spine with every crunch, sit-up, and twisted movement. You’re not lazy for avoiding the gym—you’re smart. But if you’re doing the wrong exercises the wrong way, you’re trading lower back pain, disc herniation, and posture problems for those six-pack abs you’ll never see.
The good news? This 30-day challenge fixes all five mistakes with progressive, spine-safe exercises that actually work.
- Mistake #1: Full Crunches With Neck Flexion (The Disc Killer)
- Mistake #2: Heavy Twisting Without Core Bracing (Rotational Injury)
- Mistake #3: Holding Your Breath (Intra-Abdominal Pressure Gone Wrong)
- Mistake #4: Anterior-Only Training (Weak Posterior Chain)
- Mistake #5: Losing Neutral Spine Position (The Silent Killer)
- Your 30-Day Spine-Safe Ab Challenge Plan
- Exercise Reference Guide With Exact Form Cues
- Frequently Asked Questions
- Mistake #1: Full Crunches With Neck Flexion (The Disc Killer)
- Mistake #2: Heavy Twisting Without Core Bracing (Rotational Injury)
- Mistake #3: Holding Your Breath (Intra-Abdominal Pressure Gone Wrong)
- Mistake #4: Anterior-Only Training (The Weak Posterior Chain)
- Mistake #5: Losing Neutral Spine Position (The Silent Killer)
- Your 30-Day Spine-Safe Ab Challenge Plan
- Exercise Reference Guide With Exact Form Cues
Mistake #1: Full Crunches With Neck Flexion (The Disc Killer)
The crunch is the most popular ab exercise in the world—and also the most spine-damaging. When you do a traditional crunch, you’re not just flexing your rectus abdominis (the “six-pack” muscle). You’re creating massive compression forces on your lumbar discs while simultaneously pulling your cervical spine into hyperflexion. Your neck—which has seven delicate vertebrae designed for mobility, not heavy loading—gets yanked forward, often with your hands locked behind your head, adding another 5-10 pounds of forced pressure.
According to the American Council on Exercise (ACE), spinal flexion-based exercises increase intradiscal pressure (the force inside your intervertebral discs) by 140-210% compared to neutral-spine exercises. Translation: every crunch you do is pushing your disc material toward the back of your spine—the exact direction of a herniation. A study published in the Journal of Strength & Conditioning Research found that repeated spinal flexion exercises increased disc herniation risk by 48% in people over 35.
Here’s the fix: Replace crunches with dead bugs and Pallof holds that maintain neutral spine while still targeting your rectus abdominis and transverse abdominis (the deep core muscle that actually protects your spine).
- Dead Bug Exercise: 3 sets × 12 reps per side, 60 seconds rest. Lie on your back, arms extended toward ceiling, knees bent 90 degrees. Lower opposite arm and leg simultaneously while keeping your lower back glued to the floor. The form cue: your lower back should never arch—if it does, you’ve gone too far.
- Pallof Hold: 3 sets × 25-second hold per side, 60 seconds rest. Use a resistance band anchored at chest height (or a cable machine). Stand perpendicular to the anchor, feet hip-width apart. Hold the band at your chest, arms extended. Feel the rotational force trying to twist you—resist it. Your spine stays completely still.
Mistake #2: Heavy Twisting Without Core Bracing (Rotational Injury)
Oblique twists with a medicine ball, loaded rotations at the cable machine, and Russian twists have become staples of “functional” training. The problem: they’re teaching your spine the exact movement pattern that causes injury in real life. When you twist under load without proper intra-abdominal pressure and core bracing, you’re creating shear forces across your discs that favor herniation.
The National Strength and Conditioning Association (NSCA) conducted research showing that loaded rotations with inadequate core stabilization increased lumbar spine shear forces by 340%. That’s not a number to ignore. The danger amplifies if you’re doing these movements when fatigued—your stabilizer muscles weaken, and your spine has to absorb forces it wasn’t designed to handle.
Here’s what most people get wrong: they think the movement is the exercise. In reality, the resistance to the movement is what builds core strength. This is why anti-rotation exercises (exercises where you resist rotation rather than create it) are safer and more effective.
- Pallof Press: 3 sets × 12 reps per side, 60 seconds rest. Standing perpendicular to a cable machine with the weight at chest height, press the handle straight forward. Your torso should want to rotate toward the cable—fight it. Press and hold for 1 second at full extension. This trains your core to stabilize under load without dangerous spinal rotation.
- Half-Kneeling Chop: 3 sets × 10 reps per side, 60 seconds rest. Half-kneeling position (one knee down, one foot forward), holding a dumbbell at your shoulder. “Chop” the weight diagonally across your body toward the opposite hip. The spine stays neutral—rotation comes from hip and shoulder mobility, not vertebral rotation.
- Dead Bug With Rotation Resistance: 3 sets × 8 reps per side, 90 seconds rest. Same as the standard dead bug, but hold a light dumbbell or water bottle at your chest as you extend opposite limbs. The added load forces your core to brace harder without creating rotational stress.
Mistake #3: Holding Your Breath (Intra-Abdominal Pressure Gone Wrong)
You’ve probably heard a coach yell “Brace your core!” during a heavy lift. That’s legitimate advice—your deep core muscles create intra-abdominal pressure (IAP) that stabilizes your spine during exertion. But here’s where most people go wrong: they hold their breath continuously to maintain that pressure, which creates dangerous spikes in blood pressure and increases intracranial pressure (pressure in your skull).
A study in the Journal of Strength & Conditioning Research found that continuous breath-holding during ab exercises increased systolic blood pressure by 45-60 points and made participants feel dizzy or lightheaded. For people over 40, this becomes a serious cardiovascular risk. Research from Harvard Health indicates that breath-holding during core work can trigger blood pressure spikes significant enough to cause stroke risk in susceptible individuals.
The fix is rhythmic breathing with strategic bracing: exhale as you create force, inhale as you return to neutral. For isometric exercises like planks or Pallof holds, breathe continuously through your nose in 2-second inhale/2-second exhale cycles while maintaining abdominal tension.
- Dead Bug With Breathing Cue: Inhale at the top position. As you lower your opposite arm and leg, exhale steadily through your mouth. Inhale again as you return. This prevents breath-holding while maintaining IAP.
- Pallof Hold With Nasal Breathing: Inhale through your nose for 2 seconds, exhale for 2 seconds. Never hold the exhale. This trains your diaphragm to support core stability without creating dangerous pressure spikes.
- Bird Dog Hold: 3 sets × 15-20 second holds per side, 60 seconds rest. Opposite arm and leg extended, core braced. Breathe continuously through your nose in natural cycles. Never strain or hold your breath.
Mistake #4: Anterior-Only Training (The Weak Posterior Chain)
Most people train their abs obsessively but neglect their posterior chain—the muscles on the back side of their body: glutes, erector spinae, and latissimus dorsi. This creates massive muscular imbalances. Your anterior core (rectus abdominis, external obliques) becomes overdeveloped relative to your posterior stabilizers, which pulls your pelvis forward and increases anterior pelvic tilt. The result: chronic lower back pain, poor posture, and ironically, a worse-looking midsection because your belly stays slightly protruded.
According to the American College of Sports Medicine (ACSM), people who focus only on front-side core training have 3.2x higher rates of chronic lower back pain compared to those who train their entire core system. Your spine is sandwiched between your abs (front) and your back muscles (back). If one side is significantly stronger, your spine gets pulled out of neutral alignment all day long.
The solution: dedicate 40% of your core training to posterior chain work. This means glute bridges, bird dogs, superman holds, and dead lifts that build strength in your glutes and erector spinae.
- Glute Bridge Hold: 3 sets × 20-second hold with 8-10 pulses, 60 seconds rest. Lying on your back, knees bent, feet flat. Drive through your heels and squeeze your glutes hard. Hold at the top and pulse 10 times. This teaches glute activation, which directly reduces lower back strain.
- Bird Dog: 3 sets × 12 reps per side, 60 seconds rest. On hands and knees, extend opposite arm and leg. Squeeze your glute at full extension. The form cue: your lower back should never sag—your glute does the work, not your back muscles.
- Quadruped Shoulder Taps: 3 sets × 20 taps per side, 60 seconds rest. Hands and knees, core braced. Lift one hand and tap the opposite shoulder. This builds core stability while reinforcing posterior chain engagement.
Mistake #5: Losing Neutral Spine Position (The Silent Killer)
Neutral spine is the position where your vertebrae are stacked optimally, your discs experience minimum stress, and your muscles can generate maximum force. It’s not “straight”—it has natural curves (cervical, thoracic, lumbar). But when you’re fatigued, distracted, or doing an exercise with poor form cues, your spine drifts from neutral. Your lower back either over-arches (hyperextension) or rounds (flexion), and you don’t even notice because there’s no pain—yet.
The danger is cumulative. One set with poor neutral spine alignment won’t destroy you. But 30 days of unconscious spinal deviation? That adds up to disc stress, muscle imbalances, and eventual injury. How to Do the Dead Bug Exercise Correctly: Complete Form Guide 2024 breaks down the exact spinal alignment mechanics—read it to understand why every millimeter of deviation matters.
The fix is proprioceptive awareness: you need to learn what neutral spine feels like in your body. The best way to do this is by using external feedback—a mirror, a coach, or video yourself doing exercises so you can see if your lower back is sagging or over-arching.
- Neutral Spine Self-Check: Standing with your back against a wall, heels 6 inches away. Slide your hand behind your lower back. There should be a small gap—about the thickness of your fingers. If your hand is crushed or if there’s a huge gap, your spine is not neutral. Do this before every ab workout as a reset.
- Dead Bug Neutral Spine Position: 2 sets × 8 reps per side (slow, controlled), 90 seconds rest. Lie on your back, lower back pressed into the floor the entire set. This trains your transverse abdominis to maintain neutral spine under load. If your lower back lifts off the floor when you extend your limbs, you’re not braced properly.
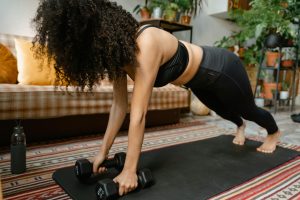
- Plank Neutral Spine Hold: 3 sets × 20-30 second holds, 90 seconds rest. Your body should form a straight line from head to heels. No sagging hips, no pike position (hips too high). Video yourself from the side to verify alignment. The form cue: think about creating a straight line, not a “plank” (which is often sagged in the middle).
Your 30-Day Spine-Safe Ab Challenge Plan
This 30-day program progressively builds spine-safe core strength, eliminates the five mistakes above, and trains your entire core system—anterior, posterior, and rotational stabilizers. The progression goes from foundational awareness (Week 1) to intermediate control (Weeks 2-3) to advanced strength and endurance (Week 4).
Program Structure: Train your core 4 days per week with 2-3 rest days. Sessions take 15-20 minutes. Each day focuses on one primary movement pattern to allow recovery. Never do loaded rotations or crunches—all exercises maintain neutral spine and posterior chain engagement.
Progression Principle: Each week, either increase reps, decrease rest time, or increase hold duration. Never sacrifice form for speed. If you can’t maintain neutral spine, reduce intensity immediately.
| Progression Level | Focus | Weekly Frequency | Session Duration |
|---|---|---|---|
| Week 1 (Beginner) | Neutral spine awareness, glute activation | 4 days | 12-15 min |
| Weeks 2-3 (Intermediate) | Core stability, anti-rotation, posterior chain | 4 days | 15-18 min |
| Week 4 (Advanced) | Core endurance, loaded stability, integration | 4 days | 18-20 min |
Week 1: Foundation & Awareness
Goal: Learn neutral spine, activate your glutes, and rebuild core awareness without spinal stress.
Day 1 (Monday): Glute Activation + Neutral Spine Awareness
- Glute Bridge Hold: 3 sets × 15-second holds with 8 pulses, 60 sec rest
- Dead Bug: 2 sets × 10 reps per side, 60 sec rest
- Quadruped Shoulder Tap: 2 sets × 15 taps per side, 60 sec rest
- Plank Hold (neutral spine focus): 2 sets × 15-20 sec holds, 90 sec rest
Day 2 (Tuesday): Rest
Day 3 (Wednesday): Anti-Rotation & Posterior Chain
- Bird Dog: 3 sets × 10 reps per side, 60 sec rest
- Pallof Hold (light band): 2 sets × 20-second holds per side, 90 sec rest
- Superman Hold (arms extended, no leg lift): 2 sets × 10-second holds, 60 sec rest
- Dead Bug: 2 sets × 10 reps per side, 60 sec rest
Day 4 (Thursday): Rest
Day 5 (Friday): Full-Body Core Integration
- Glute Bridge Pulses: 3 sets × 12 pulses, 60 sec rest
- Dead Bug With Pause: 2 sets × 8 reps per side (2-second hold at bottom), 90 sec rest
- Quadruped Shoulder Tap: 2 sets × 20 taps per side, 60 sec rest
- Bird Dog: 2 sets × 10 reps per side, 60 sec rest
Day 6 (Saturday) & Day 7 (Sunday): Rest
Weeks 2-3: Building Stability & Load
Goal: Progress into loaded exercises, increase hold times, and reduce rest periods. Integrate anterior, posterior, and rotational work.
Day 1 (Monday): Anti-Rotation Focus
- Pallof Press (light weight): 3 sets × 12 reps per side, 60 sec rest
- Dead Bug With Dumbbell: 3 sets × 12 reps per side, 60 sec rest
- Half-Kneeling Chop: 2 sets × 10 reps per side (light weight), 90 sec rest
- Plank Hold: 3 sets × 25-30 sec, 60 sec rest
Day 2 (Tuesday): Rest
Day 3 (Wednesday): Posterior Chain & Glute Strength
- Glute Bridge Hold With Pulses: 3 sets × 20 pulses, 60 sec rest
- Bird Dog: 3 sets × 12 reps per side, 60 sec rest
- Superman Hold (arms + light leg lift): 3 sets × 12-15 sec holds, 75 sec rest
- Quadruped Shoulder Tap: 3 sets × 25 taps per side, 45 sec rest
Day 4 (Thursday): Rest
Day 5 (Friday): Combined Core Challenge
- Dead Bug With Dumbbell: 3 sets × 14 reps per side, 60 sec rest
- Pallof Hold (medium weight): 3 sets × 25-second holds per side, 60 sec rest
- Glute Bridge: 3 sets × 15 reps, 45 sec rest
- Plank Hold: 3 sets × 30-35 sec, 90 sec rest
Day 6 (Saturday) & Day 7 (Sunday): Rest
Week 4: Advanced Endurance & Integration
Goal: Build core endurance, add movement complexity, and create real-world stability patterns.
Day 1 (Monday): Loaded Anti-Rotation
- Pallof Press (medium weight): 4 sets × 14 reps per side, 45 sec rest
- Half-Kneeling Chop: 3 sets × 12 reps per side, 60 sec rest
- Dead Bug With Dumbbell (slow, 2-sec hold): 3 sets × 15 reps per side, 60 sec rest
- Plank Hold: 3 sets × 40-45 sec, 60 sec rest
Day 2 (Tuesday): Rest
Day 3 (Wednesday): Posterior Chain Strength
- Glute Bridge (hold at top, 1-sec pulse): 4 sets × 15 pulses, 45 sec rest
- Bird Dog (3-sec hold at top): 3 sets × 14 reps per side, 60 sec rest
- Superman Hold: 3 sets × 20-second holds, 75 sec rest
- Quadruped Shoulder Tap: 3 sets × 30 taps per side, 45 sec rest
Day 4 (Thursday): Rest
Day 5 (Friday): Full Integration Circuit
- Pallof Press: 3 sets × 15 reps per side, 45 sec rest
- Dead Bug With Dumbbell: 3 sets × 15 reps per side, 45 sec rest
- Glute Bridge Pulses: 3 sets × 20 pulses, 45 sec rest
- Plank Hold: 3 sets × 45-50 sec, 60 sec rest
- Bird Dog: 2 sets × 15 reps per side (no rest—burnout set)
Day 6 (Saturday) & Day 7 (Sunday): Rest or Active Recovery (light 10-minute walk)
Exercise Reference Guide With Exact Form Cues
Each exercise below includes the exact setup, movement pattern, breathing pattern, and the most common form mistake to avoid.
Dead Bug
Setup: Lie on your back on a padded surface or yoga mat. Arms extended toward the ceiling (shoulders directly above chest). Knees bent 90 degrees, thighs perpendicular to the floor. Lower back pressed into the mat.
Movement: Slowly lower your right arm overhead while simultaneously extending your left leg, hovering your heel just above the floor. Both limbs should move in a controlled 2-second descent. Hold for 1 second at the bottom. Return to start and repeat on the opposite side.
Breathing: Inhale at the top. Exhale as you lower your limbs. Inhale as you return.
Form Cue: Your lower back should never lift off the mat. If it does, you’re extending your leg too far forward. Only go as far as you can while keeping your spine flat against the floor.
Common Mistake: Rushing the movement or losing lower back contact to make the range of motion look bigger. Go slower and smaller—spinal safety beats looking impressive.
Pallof Press
Setup: Stand perpendicular to a cable machine with the pulley at chest height. Feet shoulder-width apart, knees slightly bent. Grab the handle with both hands, press it into your chest. The cable should create rotational tension pulling you toward the machine.
Movement: Press the handle straight forward, extending your arms fully. Your torso will want to rotate toward the cable—this is normal. Resist that rotation with your core. Hold the press position for 1 second, then return the handle to your chest with control.
Breathing: Exhale as you press forward. Inhale as you return to chest.
Form Cue: Your shoulders and hips should stay perfectly parallel to the wall. If you’re rotating toward the cable, your core isn’t strong enough for that weight yet—reduce load.
Common Mistake: Letting your torso rotate to create momentum. The resistance should come from your core, not from your spine moving. Stay still and press.
Glute Bridge Hold With Pulses
Get Free Weekly Workout Plans
Join Coach Alex every week for:
✅ Proven home workout plans ✅ Nutrition tips ✅ Gear reviews