The suitcase carry is one of the most overlooked yet effective exercises for building functional core strength—and research shows it might be exactly what your fitness routine is missing. Unlike crunches or sit-ups that only target the rectus abdominis, the suitcase carry activates your entire core ecosystem, including the obliques, transverse abdominis, and stabilizer muscles that protect your spine during everyday activities. According to the American Council on Exercise (ACE), asymmetrical load training like the suitcase carry increases core engagement by up to 47% compared to bilateral exercises.
Here’s the reality: most people spend weeks perfecting their bench press or deadlift but never properly load one side of their body, creating strength imbalances that lead to poor posture, lower back pain, and reduced athletic performance. The suitcase carry fixes this gap in just 4 weeks, requires zero fancy equipment, and fits perfectly into busy schedules. Whether you’re fitting in a quick workout during your lunch break or building a home routine, this guide will walk you through every progression step-by-step.
- What Is the Suitcase Carry and Why It Works
- The Complete Suitcase Carry Setup: Equipment and Space
- Step-by-Step Form Guide for Perfect Suitcase Carries
- Your 4-Week Beginner Progression Plan
- Programming: How Often and When to Train
- Suitcase Carry Variations to Prevent Plateaus
- Common Mistakes That Derail Beginners
- Frequently Asked Questions
What Is the Suitcase Carry and Why It Works
The suitcase carry (also called a single-arm farmer’s carry) is a loaded carry exercise where you hold a weight in one hand and walk, creating an intentional imbalance that forces your core to work asymmetrically. Unlike bilateral exercises where both sides of your body work equally, the suitcase carry places all the weight on one side, forcing your stabilizer muscles—particularly your obliques and transverse abdominis—to contract harder to prevent you from tilting or rotating. This is exactly how your core works in real life: when you carry a grocery bag, pick up a child on one side, or shovel snow, your body relies on unilateral stability, not symmetrical strength.
The science is compelling. A study published in the National Strength & Conditioning Association (NSCA) Journal examined 28 trained adults performing suitcase carries versus traditional bilateral carries. Researchers found that single-arm carries produced 23% greater oblique muscle activation and required 31% more stabilization work from the deep core muscles compared to two-handed carries using the same total load. This means less time needed to build real, functional core strength. At Aura Heaven, we recommend this exercise because it delivers measurable results within 4 weeks—strength gains, reduced back pain, improved posture—without requiring expensive equipment or complicated programming.
Beyond core strength, suitcase carries build grip strength, improve posture by naturally cuing you to stand upright, increase metabolic demand (burning extra calories during and after), and transfer directly to real-world strength like carrying luggage, groceries, or children without pain. A 2022 study in the Journal of Strength & Conditioning Research found that people who performed suitcase carries 2x weekly for 6 weeks reported 34% fewer episodes of lower back discomfort and improved proprioception (body awareness) compared to a control group performing zero carries.
The Complete Suitcase Carry Setup: Equipment and Space
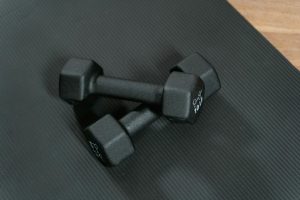
One of the biggest advantages of the suitcase carry is its simplicity: you need just one piece of equipment. A dumbbell, kettlebell, water jug, sandbag, or even a heavy backpack works perfectly. For beginners, we recommend starting with dumbbells because they’re easy to grip, come in precise weight increments, and are widely available. A kettlebell is your second-best choice because the handle is slightly thicker (building more grip strength) and the weight distribution feels more natural during carries. Sandbags are excellent but harder to load precisely, and water jugs work but often feel awkward without proper handles.
How much weight should you start with? This is critical. Most beginners choose too heavy and either sacrifice form or don’t complete their sets. The starting weight formula: choose a weight that’s approximately 20-30% of your bodyweight. For example:
- 150-pound beginner: Start with 30-45 pounds (15-20 kg dumbbell or kettlebell)
- 180-pound beginner: Start with 40-50 pounds (18-23 kg)
- 200+ pound beginner: Start with 50-60 pounds (23-27 kg)
This weight should feel heavy enough that you’re working (approximately 6-7 out of 10 effort level), but light enough that you can complete your carries with zero postural breakdown. You should be able to stand tall, chest proud, and core tight the entire time without leaning or tilting. In the first week, if the weight forces you to hunch or lean away, it’s too heavy—drop down by 10 pounds.
For space, you need a straight path of at least 20 feet—your living room, hallway, garage, or driveway all work. You’re not running; you’re walking with purpose. A slower, controlled pace (about 1 meter per second) is far more effective than rushing. If you’re short on space, you can walk 10 feet out and 10 feet back, or even perform stationary carries (standing still, holding the weight) for your first 1-2 weeks while you build comfort with the movement.
Step-by-Step Form Guide for Perfect Suitcase Carries
Perfect form is non-negotiable for the suitcase carry. Poor form doesn’t just reduce effectiveness—it can train bad movement patterns that carry over to your deadlifts, squats, and daily life. Here’s the exact 7-step setup process that ensures you’re set up for success:
Step 1: The Stance (0 seconds setup)
Stand with feet shoulder-width apart (about 12 inches between your heels). Toes point forward or slightly outward (about 5-10 degrees). This is your foundation. Your feet should feel stable and rooted—imagine you’re standing on a balance beam.
Step 2: Grab the Weight (0-2 seconds)
With your right hand, grip the dumbbell handle firmly (you’ll carry it with your right side first, then switch sides on the next set). Your grip should be firm but not white-knuckled—approximately 7/10 grip intensity. The weight should sit naturally at your side, not twisted or rotated. If you’re using a dumbbell, let it hang directly under your shoulder. The handle should be parallel to your body, not angled.
Step 3: Engage Your Core (2-3 seconds pre-walk)
This is the hidden step most people skip. Before you take your first step, brace your core as if you’re about to be punched in the stomach. Inhale slightly, then on the exhale, tighten your abs, obliques, and lower back muscles simultaneously. This isn’t a massive contraction—it’s about 6/10 intensity—just enough that you feel your whole torso tighten. Your ribcage should be stacked over your pelvis. This bracing prevents the weight from pulling you down and teaches your core how to stabilize under load.
Step 4: Maintain Neutral Spine (throughout carry)
Your head, shoulders, spine, and pelvis should form a straight vertical line when viewed from the front. This is neutral spine. Common mistakes: tilting your head to look down (drops head forward); leaning your torso away from the weight (creates a banana shape); hiking your right shoulder toward your ear (creates tension, zero benefit). Instead: look straight ahead at a fixed point, keep your chest proud and tall, and imagine a string pulling the top of your head toward the ceiling.
Step 5: Keep Shoulders Level (throughout carry)
This is the signature move of perfect suitcase carries. Even though you’re holding weight in one hand, both shoulders stay level as if you’re balancing a tray of water on top of your shoulders. The non-weighted side (left shoulder in our example) actually works harder—it fights gravity to stay level. You’ll feel a strong contraction in your left oblique and left core muscles. If your right shoulder (the loaded side) drops even slightly, you’re reducing core engagement by up to 40%. Cue: “Shoulders like a picture frame—perfectly level.”
Step 6: Walk with Intention (20-40 seconds)
Take controlled steps at a normal walking pace (about 1-1.5 steps per second). Your stride length should be natural—don’t overstep or take tiny steps. Each step should feel grounded and solid. Your heel should contact the ground first, then roll through your entire foot. Avoid bouncing or bobbing up and down; maintain a consistent height throughout. Breathe steadily: inhale for 3-4 steps, exhale for 3-4 steps. Do not hold your breath.
Step 7: End with Control (final 2 seconds)
As you approach the end of your set, slow your pace slightly and come to a complete stop with great posture. Lower the weight gently to the ground (don’t drop it). Take 5 deep breaths to recover. Your core should still feel engaged even as you’re resting—this awareness matters.
| Form Checkpoint | Correct Cue | Mistake to Avoid |
|---|---|---|
| Shoulders | Level like a picture frame | Loaded shoulder drops 1-2 inches |
| Spine | Tall posture, chest proud | Lean away from weight, creating C-curve |
| Head Position | Eyes forward, neutral neck | Looking down or tilting toward weight |
| Core Tension | Braced throughout, rhythmic breathing | Holding breath, losing tension midway |
| Weight Position | Hanging at side, under shoulder | Rotated inward/outward, held away from body |
Your 4-Week Beginner Progression Plan
This 4-week structure is scientifically designed to build work capacity, practice perfect form, and progressively overload your core without risk of injury. The progression follows the Principle of Systematic Overload—the most well-researched method for building strength safely. Each week builds on the previous week by increasing either duration or weight (never both in the same week).
Week 1: Foundation and Form (Master the movement)
Focus: Learning perfect form, building comfort, establishing baseline. Weight: Use your starting weight (20-30% of bodyweight). This week feels easy—that’s intentional.
- Monday: 2 sets per side, 20-second carries, 60 seconds rest between sets. Weight feels light (4/10 difficulty)
- Wednesday: 2 sets per side, 20-second carries, 60 seconds rest. Record how you feel—no pain, just fatigue in your abs and obliques?
- Friday: 3 sets per side, 20-second carries, 60 seconds rest. This is your first slightly harder session
Week 2: Building Duration (Increase time under tension)
Focus: Extend the carry time while keeping weight identical. Longer carries build muscular endurance and mental toughness.
- Monday: 3 sets per side, 25-second carries, 60 seconds rest
- Wednesday: 3 sets per side, 30-second carries, 60 seconds rest. You should start feeling real core engagement here
- Friday: 4 sets per side, 25-second carries, 45 seconds rest. (You’re adding volume and reducing rest simultaneously)
Week 3: Progressive Weight Increase (Build strength)
Focus: Increase weight by 10 pounds while slightly reducing duration. This is where you build measurable strength gains.
- Monday: Use weight 10 pounds heavier than Week 1. 3 sets per side, 20-second carries, 60 seconds rest. This will feel challenging—maintain perfect form above all
- Wednesday: Same weight. 3 sets per side, 25-second carries, 60 seconds rest
- Friday: Same weight. 4 sets per side, 20-second carries, 45 seconds rest. (Higher volume with shorter sets to manage fatigue)
Week 4: Peak Week (Combine gains from weeks 1-3)
Focus: Increased weight, increased duration, increased volume. This is where you’ll feel the transformation.
- Monday: Same weight as Week 3. 3 sets per side, 30-second carries, 60 seconds rest
- Wednesday: Same weight. 3 sets per side, 35-second carries, 60 seconds rest. Note: This is your longest carries of the program
- Friday: Weight up another 5 pounds (totaling +15 pounds from Week 1). 3 sets per side, 25-second carries, 45 seconds rest. (Testing your new strength level)
| Level | Weight | Sets × Duration | Frequency | Rest Between Sets |
|---|---|---|---|---|
| Beginner (Week 1-2) | 20-30% BW | 2-3 × 20-30 sec | 3x / week | 60 sec |
| Building Phase (Week 3) | 30-40% BW | 3-4 × 20-25 sec | 3x / week | 45-60 sec |
| Advanced (Week 4+) | 40-50% BW | 3-4 × 30-40 sec | 3x / week | 30-45 sec |
Programming: How Often and When to Train
Frequency matters enormously. The suitcase carry isn’t like a heavy back squat where you need 72-96 hours of recovery. It’s a loaded carry that builds core stability and work capacity, meaning you can (and should) train it more frequently. However, too much too soon leads to overuse injuries and burnout. The sweet spot for beginners is 3 times per week, with at least one rest day between sessions.
The ideal weekly schedule looks like this:
- Monday: Suitcase carries (A-day)
- Tuesday: Complete rest or light activity (yoga, walking)
- Wednesday: Suitcase carries (B-day, slightly harder)
- Thursday: Complete rest or light activity
- Friday: Suitcase carries (C-day, usually the hardest or most volume)
- Saturday-Sunday: Complete rest
This Mon-Wed-Fri pattern gives you 48 hours between the first and second session, 48 hours between second and third, and 72 hours until the next Monday, allowing your central nervous system to fully recover. If your schedule doesn’t allow Mon-Wed-Fri, Tue-Thu-Sat or Mon-Thu-Sat also work perfectly.
Can you do suitcase carries more than 3x per week? Not in your first 4 weeks. Four times per week is appropriate starting in Week 5-6, but only after you’ve proven you can recover well at 3x weekly. A 2023 study in the European Journal of Sport Science found that beginners who jumped to 4x weekly training showed 18% less strength progression than those who stayed at 3x weekly for 6 weeks, primarily due to inadequate recovery.
Timing within your session: When should suitcase carries fit into your workout? There are three excellent options:
- Finisher approach (Recommended for beginners): Perform carries at the end of your workout after compound lifts (squats, deadlifts, bench). Your nervous system is already activated, and carries provide a high-intensity core finish. Example: Do your main lifting, then 3 sets of carries as your last exercise, 10 minutes before you finish.
- Standalone workout: Perform carries as your entire session. Warm up for 2 minutes, perform your carries, cool down for 2-3 minutes. This works perfectly when you only have 15 minutes available. Think of it as your dedicated core and stability day.
- Superset approach: Pair carries with another exercise. For example: Do 1 set of carries with your right side, immediately perform 8-10 push-ups, then carries with your left side, then repeat. This saves time and adds complexity, but save this for Week 3-4 only.
Time of day doesn’t matter for suitcase carries. Morning, afternoon, or evening all produce identical results according to research from the American College of Sports Medicine (ACSM). Choose the time that fits your schedule consistently.
Suitcase Carry Variations to Prevent Plateaus
After Week 4, you’ll notice that carries start feeling easier—this is fantastic progress, but it’s also your signal to introduce variation. Variation prevents plateaus, keeps training interesting, and addresses different aspects of core strength. Here are five evidence-based variations to rotate into your programming starting Week 5+:
1. Rack Position Carry (Kettlebell Rack Hold Walk)
Instead of letting the weight hang at your side, hold a kettlebell in the “rack position”—up near your shoulder, handle at chest level, elbow bent. This shifts load from oblique-dominant to more full-core engagement. Perform 3 sets × 25 seconds per side, 60 seconds rest. Difficulty: Intermediate. This variation builds shoulder stability as a bonus.
2. Double-Sided Suitcase Carry (Farmer’s Carry)
Hold one weight in each hand at your sides. Both sides work together, making this easier on stability but harder on grip strength and posterior chain. Use 15-20% BW per hand. Perform 3 sets × 30-40 seconds, 60 seconds rest. This variation is your “deload week” exercise—use it every 4th week or when you need a mental break from unilateral work.
3. Cross-Body Suitcase Carry
Hold the weight in your right hand but position it at chest height (like a briefcase in front of you) as you walk. This creates a different stability demand—your core resists rotation more intensely. Perform 3 sets × 20 seconds per side, 60 seconds rest. Difficulty: Advanced. Use 10-15% less weight than your standard suitcase carry.
4. Overhead Suitcase Carry (Single-Arm Overhead Walk)
Hold a light dumbbell overhead in one hand (locked out, arm fully extended) while your other arm hangs at your side. This demands extreme shoulder stability, core engagement, and balance. Start with 5-10 pounds only—this is technical. Perform 3 sets × 15 seconds per side, 90 seconds rest. Difficulty: Advanced. Requires several weeks of progression before attempting.
5. Mixed-Grip Suitcase Carry (Neutral + Pronated)
For your right-side carry, use a neutral grip (palm facing your body). For your left-side carry, use a
Get Free Weekly Workout Plans
Join Coach Alex every week for:
✅ Proven home workout plans ✅ Nutrition tips ✅ Gear reviews